TRAINZ BASIC RE-SKINNERS GUIDE FOR DUMMIES
by Rick Hargraves (aka, thegrindre)
Originally posted at http://www.geocities.com/thegrindre/ (now defunct)
Under the Windows XP platform there seems to be an interest in this area and I thought I'd share some really basic things I do when I re-skin. It's mostly copy and paste with a little touch up to make things look a little better. This usually involves a little pixel by pixel editing. I understand that some of the problems folks are having are in accessing certain files like .tga. And, that's where Irfanview comes into play.
I'm going to try to keep this tutorial as simple as possible. When I say basic and simple, I mean the bare bones of the task of re-skinning. I also want to keep it short and try to avoid long winded explanations so, if I sound curt or demanding I don't mean to be. I'm only trying to use the K.I.S.S. principle throughout this whole tutorial. (Keep It Simple Stupid)
Please note:
- Rule 1. I am NOT going to teach you how to operate Windows XP and all of it's functions. That you must learn elsewhere.
- Rule 2. I am NOT going to teach you how to operate MSPaint and all of it's functions. That you must learn elsewhere.
- Rule 3. I am NOT going to teach you how to operate Irfanview and all of it's functions. That you must learn elsewhere.
- Rule 4. I am NOT going to teach you how to operate Trainz and all of it's functions. That you must learn elsewhere.
(I meant to be curt and demanding here, sorry.)
That said, I will share with you the steps I use in each of the above mentioned programs for re-skinning your favorite model. I will also try to share pictures when ever I can for simplicity's sake. Someone once said that a picture is worth a 1,000 words.
First things first, though. You must have MSPaint and Irfanview installed on your computer before any of this will make any sense. Don't forget the plugins when downloading Irfanview . You'll need them. A mouse is a must, and I will use the following descriptions when referring to its’ movement:
LMC = Left Mouse Click
RMC = Right Mouse Click
HLMC = Hold Left Mouse Click
HRMC = Hold Right Mouse Click
OK, here we go. Let's re-skin a section of Elvenor's little 3 foot narrow gauge caboose. It must be
installed before we can manipulate the files, though.
Come back here when you've done that...
Are you back? Good...
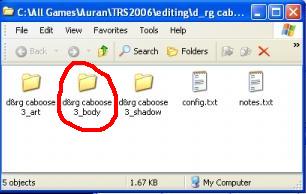
Navigate to the caboose file folder and open it. It should look something like the picture below depending on how you have your Windows set up. You're now going to open that folder I have circled in red. Double LMC to open. (Rule 1 & 4 apply here.)
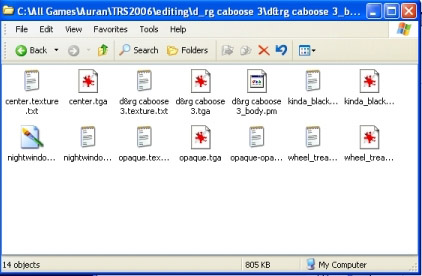
Once that folder is opened, it should look something like this; (If necessary go to the top toolbar, find ‘VIEW’ then LMC to open, then LMC ‘ICON’. This changes the way we view these folders to the same format I'm using.)
Good, now,
The next step involves the use of Irfanview.
We'll have to view a file and then re-save it into another format so we can edit it.
If you don't have Irfanview, you won't be able to complete this tutorial.
In case you don't have it, here is the website for the downloads: http://irfanview.softwarecenterz.com/
Once you have it installed, come back to this point and we can proceed.
Are you back? Great...
OK, let's continue...
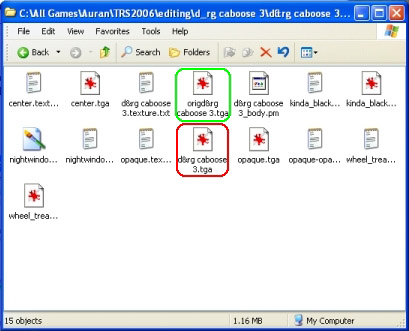
We're now going to open the file I have circled in red with Irfanview, however, before we do, I want you
to rename it and make a copy of it, in that order. It's a safety measure in case we really screw things
up while skinning.
To rename it, RMC on the file in red, scroll to RENAME and write origd&rgcaboose 3.tga, or some such
thing, then hit your ENTER key to save the new name.
To make a copy, HRMC and drag the file to a clean space in that window and then release. A little menu
will pop-up. Select Copy.
Bingo, you now have two copies of the original file but, we need to make a working copy so we can see this caboose in the game so, re-name this copy to it's original file name, d&rgcaboose3.tga and, your folder should look similar to this,
(The re-skinning process is getting closer...)
Anyway, open our newly created .tga file with Irfanview, (Rule 3 applies, here.), and have a look around. Use the 'Shift - + ' keys to enlarge it. If all went well so far, it should look like this;
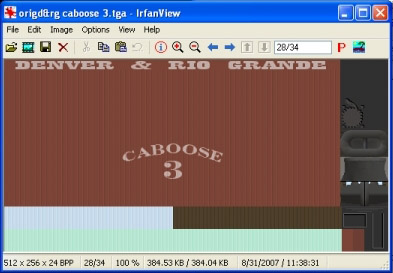
This is a texture mapping file. This is the file where the author has placed all of the textures for the various parts of the model. Some of it is obvious but some of it is confusing and unknown. This is where trial and error come into play upon finding parts of the model to re-skin. Meanwhile, let's re-save it into another format so we can RE-SKIN it. Yeah!
Select, File/Save as..., and save it into a BMP - Windows Bitmap file to your desktop. We can now start the re-skinning process safely without doing damage to any of the files in that folder we started with. As a mater of fact, let's minimize that folder to get it out of the way for now. (Rule 3 applies here.)
(Oh, by the way, I usually save these files to my desktop for ease in finding them. They can be dragged and dropped from the desktop easier, usually.)
Before we start re-skinning, I would like to make something perfectly clear about this part of the hobby. This is precise work and will need to be done pixel by pixel. There is very little room for mistakes so, please pay attention to what I'm going to share with you.
Now, with MSPaint, let's open that .bmp file you just created and have a look around. It should look
like this,
(Next step is the skinning process...)

Because this is only a bare bones tutorial on re-skinning, I'm now going to show you how to remove/re-skin the CABOOSE 3 lettering. We will now have to 'blow it up' so we can be accurate in doing so.
LMC that little magnifying glass thingy then LMC 6+ when the window opens. Now, center your view using the scroll bars. (NOTE: Always increase your magnified power to the largest possible for accuracy. Remember my above statement, “there is very little room for mistakes, here”.)
Blown up and centered, it should look like this,
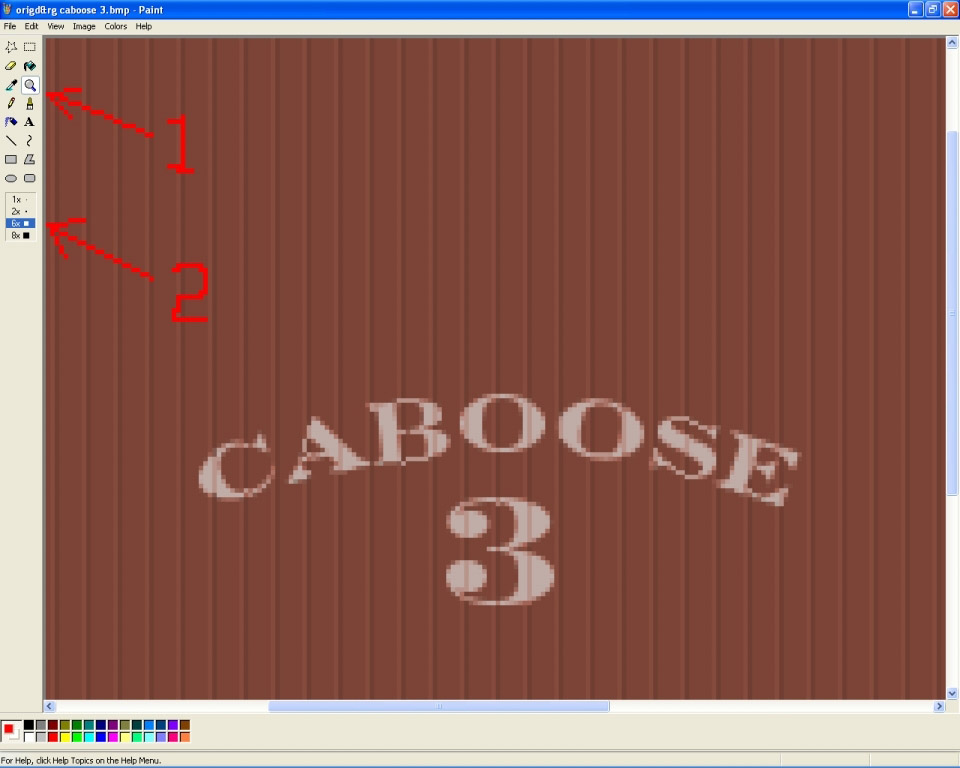
Upon close examination of the 'siding'/skin, you'll notice a very uniform pattern. It has no wood grain to speak of, or any shading or weathering to hinder us in any way and, that is one of the reasons I choose this caboose. It will make this little job the easiest you'll ever encounter
Let's do it...
LMC on that little square box thingy then, in an area just above the words Caboose 3, HLMC and drag a
box towards the bottom right, but not going into the letters of the Caboose, then let go.
All we’re doing here is making a box the same size as the area of the writing.
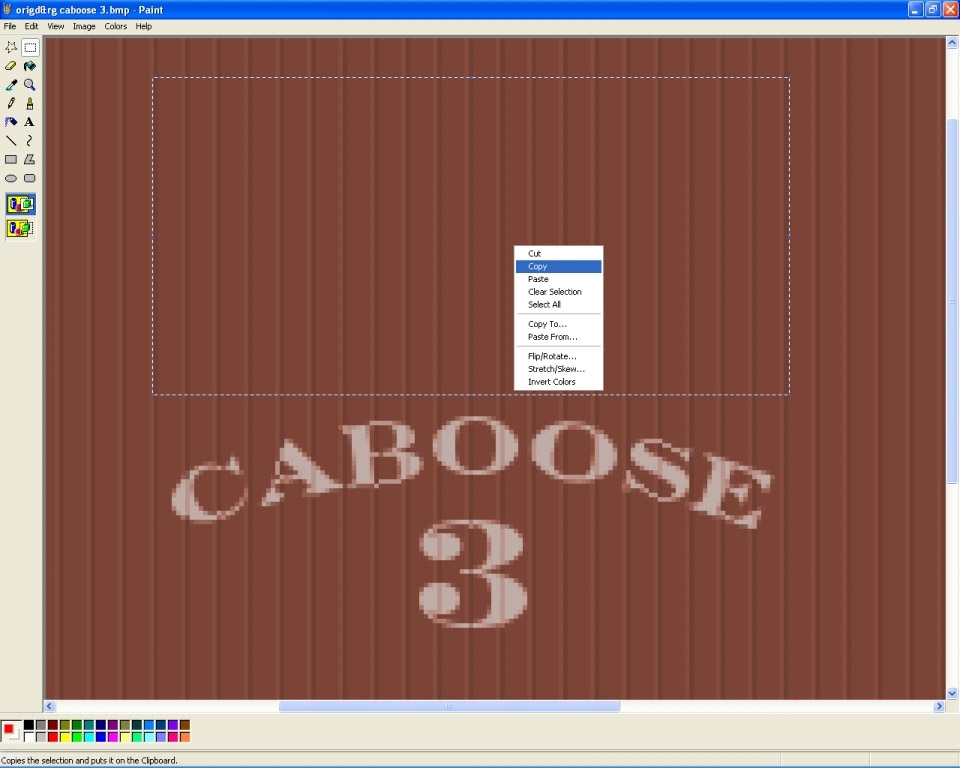
Notice how I used the dark lines in the boards for the width of my box. They will be used as a guide for the paste process in another second or two. Now, move your pointer to within the box you just made and RMC and choose COPY. We now have a copy of a clean piece of 'siding'/skin on the clip board, (in memory), with dark guide lines for pasting. (Please note that the above paragraph is the absolute basic functions of MSPaint. It's probably the easiest graphics application you will ever use and is very limited in it's functionality and not liked by many but, it's a great little app for doing quick jobs such as this one so, Rule 2 applies here.)
Here's a couple of pics showing the above process in action,
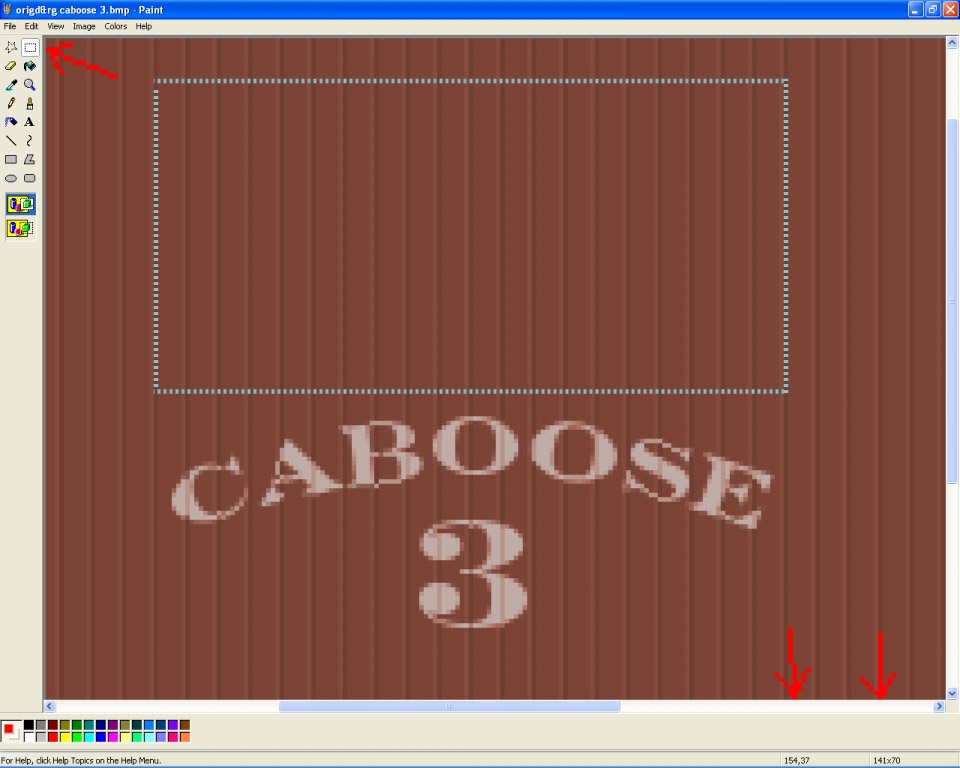
Those two vertical arrows in the lower right hand corner are pointing to your pointer coordinates and will be used for more precise work. Just a note for later tutorials. They will help a bit later when you need them.
OK, let's re-skin it...
RMC anywhere and choose PASTE.
Bingo! That squared object that just appeared is your new piece of 'siding'/skin you're going to slide
into place. Move your mouse pointer to within the square box and HLMC to drag it around, carefully
aligning the dark width lines we used as guides.
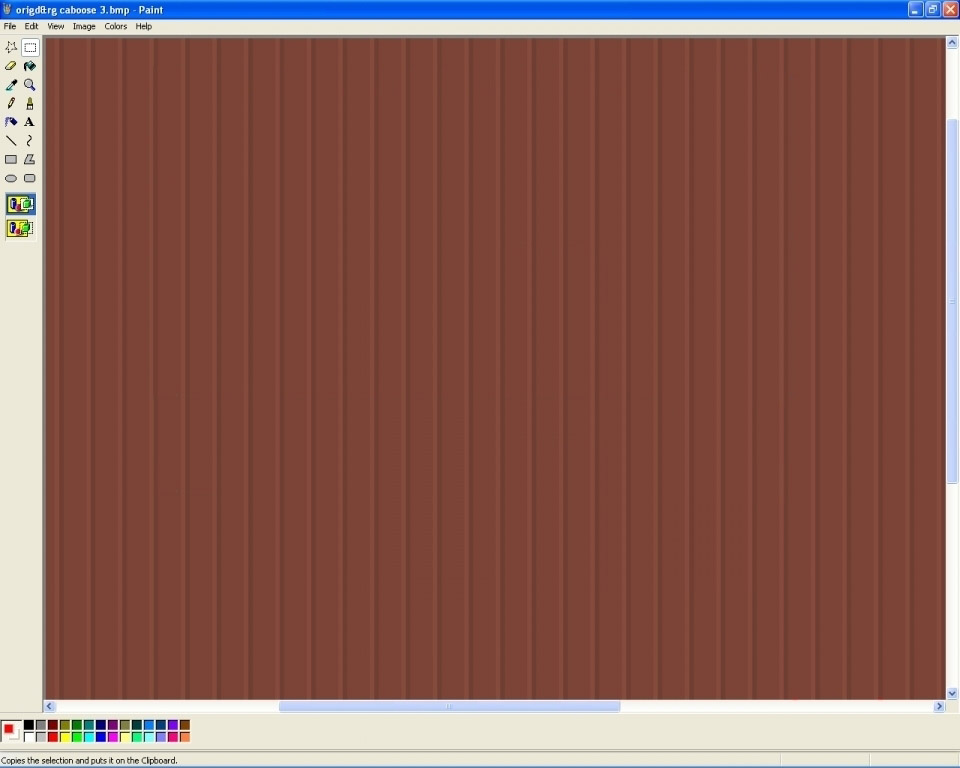
When you have it aligned where you want it, LMC anywhere outside the square/box and, (!VOILA!) you're
done.
It should now look like this,
Oops, did you mess it up? Don't panic, MSPaint has three undos you can use. LMC Edit, click Undo , then click Paste again.
Let's wrap this thing up so we can admire our handy work.
LMC File then Save.
Re-open this file you just saved with Irfanview because we have to save it again BACK to it's original
.tga format to be able to use and test it.
So, LMC File then Save as... this time and save it as a .tga file to your desktop.
Now, drag and drop the 'new' .tga file you just made into the folder we started with at the beginning of
this tutorial. Note: This task may ask you if you want to replace an existing file. Say yes.
(This folder should be minimized to your taskbar, remember?)
That's it! You may now close all your folders/windows and launch the game to admire your newly skinned model. Now, let's really sum this thing up into steps.
- Find and open the folder of the item you want to re-skin. (Nothing but file manipulation)
- Find and open, with Irfanview, the texture file you want to edit/re-skin. (Nothing but file manipulation)
- Re-save it into another format for editing/re-skinning. (Nothing but file manipulation)
- Editing/re-skinning with your favorite graphics app and save it. (The part I taught here. Might take hours, days, or weeks to complete)
- Open it with Irfanview to save it back again to the original format. (Nothing but file manipulation)
- Drag and drop this new texture file into the folder you opened to start with. (Nothing but file manipulation)
- Launch the game to test and admire your work. (Having fun with your work)
And, that my friends, is the absolute, bare bones of re-skinning.
If you'd like to download this tutorial in Acrobat format, click HERE (1MB)!
Enjoy!